Getting Secure: Transferring a domain to AWS and enabling HTTPS under nginx
2016 February 15th by todd anderson
Introduction
I recently decided to put this site under HTTPS after reading this article/interview with Anselm Hannemann on CSS-Tricks:
> https://css-tricks.com/interview-web-security/
I had already been interested in moving to HTTPS with the advent of an open Certificate Authority, Let's Encrypt, and my growing fascination with Service Workers, which will only work under HTTPS. Not sure if I would ever have a need for offline support for this site, but it never could hurt to mess around.
In any event, I had decided it was time to explore putting custardbelly.com under HTTPS - please don't poke around, it needs a major update - and as I went about trying to set Let's Encrypt up on my current (now old) VPS host I was running into road blocks of predetermined OS'es and dependencies that were beyond my control, which can happen if you entrust hosting your domains through a general VPS provider.
To have more control over my environment, I decided to use the Amazon Web Services (AWS) knowledge I have gained from working intimately with it in my current job/role and spin up an EC2 instance to dedicate to my site - moving it off the VPS I previously had.
In doing so, I wanted to share my process and experiences to any of you that may be wondering how to do the same. As the title suggests but does not entirely convey, my process involved:
- Moving a domain to an EC2 instance
- Transferring DNS records from a VPS to Amazon Route 53
- Setting up nginx to serve my site
- Generating certificates from Let's Encrypt
- Setting up my site to be served under HTTPS
- Conclusion
- References
Moving a Domain to an EC2 Instance
This series of steps is essentially moving any files served by my previous VPS host to an EC2 instance on AWS. Because the site and its blog are all static files, it was a simple matter of moving - or rather pulling - my files to a new server.
Setting up an EC2 Instance
If you don't already have an Amazon Web Services (AWS) account, you can sign up for one here: https://aws.amazon.com/.
I wont go into any detail about what AWS is, how to set up an account and the pricing models, so please review all documentation if you are curious.
Once you have signed in:
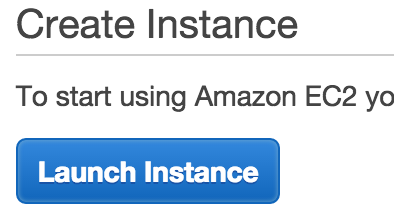
- Navigate to the Compute:EC2 space
- Once the EC2 Dashboard select Launch Instance
- Select the Ubuntu Server 14.04 LTS (HVM) instance from the list of AMIs
- Choose the t2.micro item from the Instance Type selection screen
- Click Next: Configure Instance Details
- Leave the default form entries and click Next: Add Storage
- Leave the default form entries and click Next: Tag Instance
- From the Key/Value form, enter in the name related to your site into the Value field. In my case, I entered
custardbelly.com, but it does not have to specifically be your domain name. - Click Next: Configure Security Group
- Under Assign a security group, select Create new security group
- You will need to create security group with - at least - the following ports available:
22,80,443
- You will need to create security group with - at least - the following ports available:
- Use the Add Rule button to add protocol types and ports

- Click Review and Launch
- On the next page, accept the review and click Launch
- If you do not already have a key pair on your system through your AWS account that you want to associated with your site, then Create a new key pair; otherwise, Choose an existin key pair.
Once accepting the license agreement, you should be redirected to the EC2 Dashboard:Instances page and see your new instance listed - most likely spinning up with an Initializing... note.
We'll wait until that is finished initializing before SSH'ing into it, but before we do that, we can assign an Elastic IP to the instance so that the IP is not potentially change by AWS at any time.
Defining an Elastic IP
By associating an Elastic IP to an AWS instance, you are essentially reserving a static IP for your instance that won't change as long as it is associated in your account.
I won't go into detail about Elastic IPs, so please refer to the documentation if interested: http://docs.aws.amazon.com/AWSEC2/latest/UserGuide/elastic-ip-addresses-eip.html.
To assign an Elastic IP to your newly launched instance:
- From the EC2 Dashboard select the Network & Security: Elastic IPs from the left-hand tree menu
- Select Allocate New Address
- From the modal window, click Yes, Allocate
- Click on the newlly added address in the listing
- From the Actions button, above the listing_, select Associate Address
- In the Associate Address dialog, start typing the name Value giving to the newly launched instance in the Instance field
- Once you see the entry for your newly launched instance from the previous section, select it and fill the Instance field value
- In my case, that is
custardbelly.com
- In my case, that is
- Click Associate
- Upon association of the new Elastic IP, you should see your Instance show up in the listing entry
At this point, if you navigate back to Instances:Instances from the EC2 Dashboard, you should see your newly launched instance listed, and the Public IP field should display the associated Elastic IP and appear in blue.
Site Files
The main site files are hand curated and live in a github repo. The blog site is generated from markdown and has its own github repo, as well; its a bit overblown for its purpose now, but at the time it was used as a tooling system to generate markdown from Wordpress post as described in a previous article.
Using the newly associated IP for the instance and the key generated, I SSH'd into the box and pulled down my site sources. For example:
$ ssh ~/.ssh/custardbelly.pem ubuntu@xxx.xxx.xxx.xxx
Since this blog and the main site are static files and all it took was to do some git clone's on my new instance and move some things to their respective places. But first I had to install git:
$ sudo apt-get update
$ sudo apt-get install git
Once I installed git and pulled down my repos, I moved the main site files to /var/www/custardbelly.com/public_html and the blog files to /var/www/blog. Then I added a sym-link from /var/www/custardbelly.com/public_html/blog to /var/www/blog, so that whenever I needed to get updates to the blog on my server, I didn't have to fuddle about in the main site's directory.
This was a rudimentary first pass on getting my site and blog set up. In the future, I will add deployment strategies to these repositories, either in the form of a Continuous Integration server or with tools such as shipit. Props to Kyle Kellogg on opening my eyes to it.
If you do not maintain your site in a Version Control System (VCS), you may need to go through other avenues to get your site files onto the instance...
With the site and blog files up on the new instance, it was time to tell the world to look there when they requested it.
Transferring DNS Records
When defining DNS Records for my website, I had used the administrative control panel provided by my previous VPS host to register my domain; it was pretty straight-forward and allowed me to easily enter in the records to my domain name provider.
Now, when broaching the subject of Domain Name Servers (DNS) and how your browser actually resolves a request with a domain name to an IP, my eyes start to glaze over and the mind wonders. In other words, I am of no authority to actually speak on the topic so I hope you check out some of these articles for a better understanding:
- https://en.wikipedia.org/wiki/Domain_Name_System
- https://webhostinggeeks.com/guides/dns/
- https://pressable.com/blog/2014/12/23/dns-record-types-explained/
- DNS Resolution, Step By Step (video)
That said, with what little I do understand, I know I needed to associate DNS records - specifically NS values - with my domain name purchased from my current Domain Name Provider.
I use directnic to buy my domains, but I won't go into how you define the DNS values for your domain because I am certain it will differ from provider to provider.
Neverless, I had to go into the administrative console of my Domain Name Provider account and assign the DNS records created in the next sections using Amazon Route 53.
Amazon Route 53
Until I started investigating moving my site to an EC2 Instance so I had more control over how my site is served, I honestly never heard of Amazon Route 53. The dcoumentation for Amazon Route 53 states that it provides three main functions:
- Domain Registration
- Domain Name System (DNS) service
- Health checking
I am only concerned about the DNS service side of the Route 53 as I have already purchased my domain and don't consider my site critical enough to set up CloudWatch for alarms on my site not being available.
When I went about moving my domain service to Amazon Route 53, I referred to the following documentation: http://docs.aws.amazon.com/Route53/latest/DeveloperGuide/MigratingDNS.html.
I won't rehash the listing of steps for what I performed from the link above, because they are pretty much what I followed. The only difference was I didn't obtain a DNS configuration from my DNS Provider and import it. Instead I:
- Created a new Hosted Zone
- Upon creation, selected Create Record Set
- Created a Record Set with Type: A - IPv4 Address with a value of the Elastic IP of the AWS Instance set up previously
- Clicked Create
- Created a Record Set with Type: CNAME with the
wwwname and a value of the naked domain - Clicked Create
I then had a Hosted Zone for custardbelly.com with 3 record entries for: NS, A and CNAME.
After creating a Hosted Zone in Amazon Route 53, I took the auto-generated NS values (there were 4 in total) and set those as the the Nameserver records for my domain on my Domain Name registrar.

Check with dig
The new DNS for my domain got resolved rather quickly compared to the many times I have done this for domains before; it look about 3 minutes, but I think I got lucky. Anyway, I checked using the dig utility to make sure it was up and associated with the Elastic IP I assigned:
$ dig custardbelly.com
Response:
; <<>> DiG 9.8.3-P1 <<>> custardbelly.com
;; global options: +cmd
;; Got answer:
;; ->>HEADER<<- opcode: QUERY, status: NOERROR, id: 58244
;; flags: qr rd ra; QUERY: 1, ANSWER: 1, AUTHORITY: 0, ADDITIONAL: 0

;; QUESTION SECTION:
;custardbelly.com.    IN  A

;; ANSWER SECTION:
custardbelly.com. 300 IN  A xxx.xxx.xxx.xxx

;; Query time: 105 msec
;; SERVER: 75.75.75.75#53(75.75.75.75)
;; WHEN: Wed Feb 10 20:39:01 2016
;; MSG SIZE  rcvd: 50
The Elastic IP associated with the AWS Instance I set up for my site is now shown as the A response from a dig request - the same I defined in the A field of my Hosted Zone record in Amazon Route 53.
Setting Up nginx
Even though the DNS resolves the domain to the IP assocated with the AWS Instance, there is nothing - at the moment, during this setup - to be displayed when making a request from a browser.
Installation
To install nginx on the new box, I ssh'd into the box and issued the following:
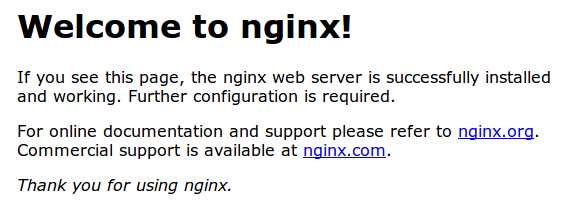
$ sudo apt-get install nginx
That should install nginx and start the service, with its default configuration on port 80. I visited my site again - at http://custardbelly.com - and saw the following page:
In order to point to the files I uploaded for my site, I needed to then add custardbelly.com to the sites-available and sites-enabled directories of the nginx configuration install.
Configuration
By default, nginx sets up the site on port 80 by defining a default configuration defined in /etc/nginx/sites-available and exposed in /etc/nginx/sites-enabled. In order to get nginx to point to the site files I uploaded to /var/www/custardbelly.com/public_html in a previous section of this post, I need to add a new file to /etc/nginx/sites-available and sym-link it in /etc/nginx/sites-enabled.
To do that, I ssh'd into my box and:
$ sudo service nginx stop
$ sudo touch /etc/nginx/sites-available/custardbelly.com
$ sudo vim /etc/nginx/sites-available/custardbelly.com
And in vim editor, entered the following:
server {
  listen 80 default_server;
  listen [::]:80 default_server;

  server_name custardbelly.com www.custardbelly.com;

  root /var/www/custardbelly.com/public_html;
  index index.html index.htm;
}
I wrote and quit out of the vim editor, then removed the default and added custardbelly.com to the sites-enabled:
$ sudo rm -f /etc/nginx/sites-enabled/default
$ sudo ln -s /etc/nginx/sites-available/custardbelly.com /etc/nginx/sites-enabled/custardbelly.com
After adding custardbelly.com to the enabled site for nginx and exposed on port 80, I restarted nginx:
$ sudo service nginx start
Now navigating in a browser to http://custardbelly.com - or its www domain - resulted in being served up the index page moved to /var/www/custardbelly.com/public_html/index.html.
With the non-secure site files setup under nginx, it was time to generate a certificate and serve the site under https.
Generating Certificates from Let's Enrypt
Let's Encrypt is a relatively recent Certificate Authority (CA) that boasts being free, automated and open. Essentially, it allows you to manage certificates for your site - to be hosted under HTTPS - without having to go through a 3rd-party vendor.
To generate a certificate through Let's Encrypt for my domain - both naked and www - I cloned the repo and issued a cert for my "standalone" webserver... but first I stopped nginx again:
$ sudo service nginx stop
... then:
$ git clone https://github.com/letsencrypt/letsencrypt
$ cd letsencrypt
$ ./letsencrypt-auto certonly --standalone --email support@yourdomain.com -d custardbelly.com -d www.custardbelly.com
support@yourdomain.comshould be an actual email address at which you want to be notified in case of certificate expiration.
I then verified that the cert for custardbelly.com was created by issuing:
$ sudo ls /etc/letsencrypt/live/

...

> root root 4096 Feb  10 19:39 custardbelly.com
The custardbelly.com is a directory with key files to be used in defining how to provide SSL for your server in the configurations, as described in the next section.
Updating nginx Site Configuration
Now that I generated a cert using Let's Encrypt to be able to serve my site under HTTPS, it was time to update the site configuration for nginx.
I opened up my /etc/nginx/sites-available/custardbelly.com file and edited it to include a redirect to HTTPS:
server {
  listen 80 default_server;
  listen [::]:80 default_server ipv6only=on;

  server_name www.custardbelly.com custardbelly.com;

  return 301 https://www.custardbelly.com$request_uri;
}

server {
  listen [::]:443 ssl;
  listen 443 ssl;

  ssl_certificate /etc/letsencrypt/live/custardbelly.com/fullchain.pem;
  ssl_certificate_key /etc/letsencrypt/live/custardbelly.com/privkey.pem;

  root /var/www/custardbelly.com/public_html;
  index index.html index.htm;
}
Essentially, I am forwarding all requests on port 80 to 443. You will also note the entries for ssl_certificate and ssl_certificate_key which point to the cert generated using Let's Encrypt.
This is a very rudmentary example of what your site configuration should look like under nginx, but am keeping the minimum in relation to the task at hand.
I then restarted nginx:
$ sudo service nginx start
Navigating to https://www.custardbelly.com/blog in a browser and it showed up! Checked to make sure that the redirect under HTTP request worked as well and, sure enough, my site is now accessible under HTTPS :)
Now the only issue at this point is that a lot of my resources in pages point to HTTP endpoints directly... that is a sore point for a lot of browsers and results in the dreaded Mixed Content.
Setting up my site to be served under HTTPS
Once you move your site to be served up under HTTPS and then point your favorite browser to your site, you may find that it does not look or function as it did previously - as it did for me. That was because a lot of the resources on the pages of my site were being blocked because the site under HTTPS was trying to make requests for content under HTTPS; such resources were CSS files, Javascript files, images, etc.
If you were to open up Console panel of the developer tools in your browser when pointing to your site under HTTPS, you most likely will see a lot of Mixed Content entries. In my case, Google Chrome was blocking requests over differing protocols, even if I was making calls relative to the page (i.e., not cross-site).
Luckily enough, for me, I was using templates for my blog and only had to change the link references in a single template and regenerate all my posts. Once I had done that, all the pages rendered as they did previously when served under HTTP.
Read more about Mixed Content and Google Chrome here.
Conclusion
Getting this site under HTTPS using using Amazon Web Services to host and Let's Encrypt to secure was quick and painless - in just a few hours I was up and running!
Hopefully this article will help anyone else out there interested in moving their site from HTTP to HTTPS. Good luck!
If you do find any content no longer available, please let me know in the comments. Much appreciated!
References
- https://https.cio.gov/
- https://www.smashingmagazine.com/2016/02/breaking-it-down-to-the-bits-how-the-internet-dns-and-https-work/
- http://docs.aws.amazon.com/Route53/latest/DeveloperGuide/Welcome.html
- http://docs.aws.amazon.com/Route53/latest/DeveloperGuide/MigratingDNS.html
- https://www.digitalocean.com/community/tutorials/how-to-install-nginx-on-ubuntu-14-04-lts
- https://www.digitalocean.com/community/tutorials/how-to-secure-nginx-with-let-s-encrypt-on-ubuntu-14-04
- https://developers.google.com/web/fundamentals/security/prevent-mixed-content/what-is-mixed-content